

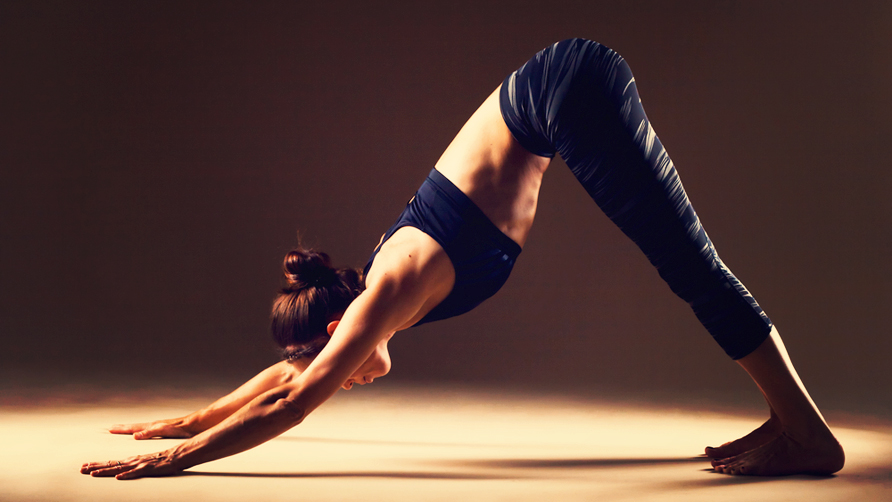
Downward Facing Dog
This is one of the most common exercises in the unofficial yoga handbook. You’ll see the Downward Facing Dog done everywhere: from yoga workshops to the most hardened of classes. Simple to do and extremely effective, the Downward Facing Dog helps to get your body fully circulating while stretching out both your calves and your heels. To accomplish the Adho Mukha Svanasana (Sanskrit name) you must start out on all fours with your hands and knees roughly shoulder width apart. From there you will walk your hands away from your head, spreading your fingers to maintain flexibility. Make your toes curl and then press up your hips so that you begin to make a severe bridge. Don’t take your hands off the floor and make sure your feet are flat. Hold the position and repeat.
Downward Facing Dog
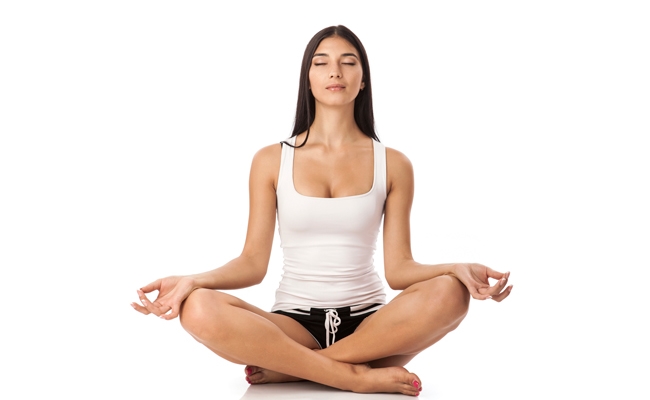
Simple Crossed Legs
Everything you do must start with a solid foundation and that is why we don’t mind starting our yoga out with the Sukhasana, or the Simple Crossed Legs. Simply lay out your yoga mat and take a seat with your legs crossed and your hands resting on your knees, palms facing upward. This should be similar in appearance to every martial arts movie you’ve seen where the hero is quietly meditating by himself. Now close your eyes and slowly inhale. While you are inhaling you want to be pushing the bones that are touching the floor downward, into the ground. Keep your back straight, but still as relaxed as you need to be in order to turn inward, and hold the position for as long as you want. This is a great, soothing way to escape the trials of the day and attune yourself with your body. While many weight loss tips are all about sweating out the difficult yoga positions, you need to know how to relax as well.
Simple Crossed Legs
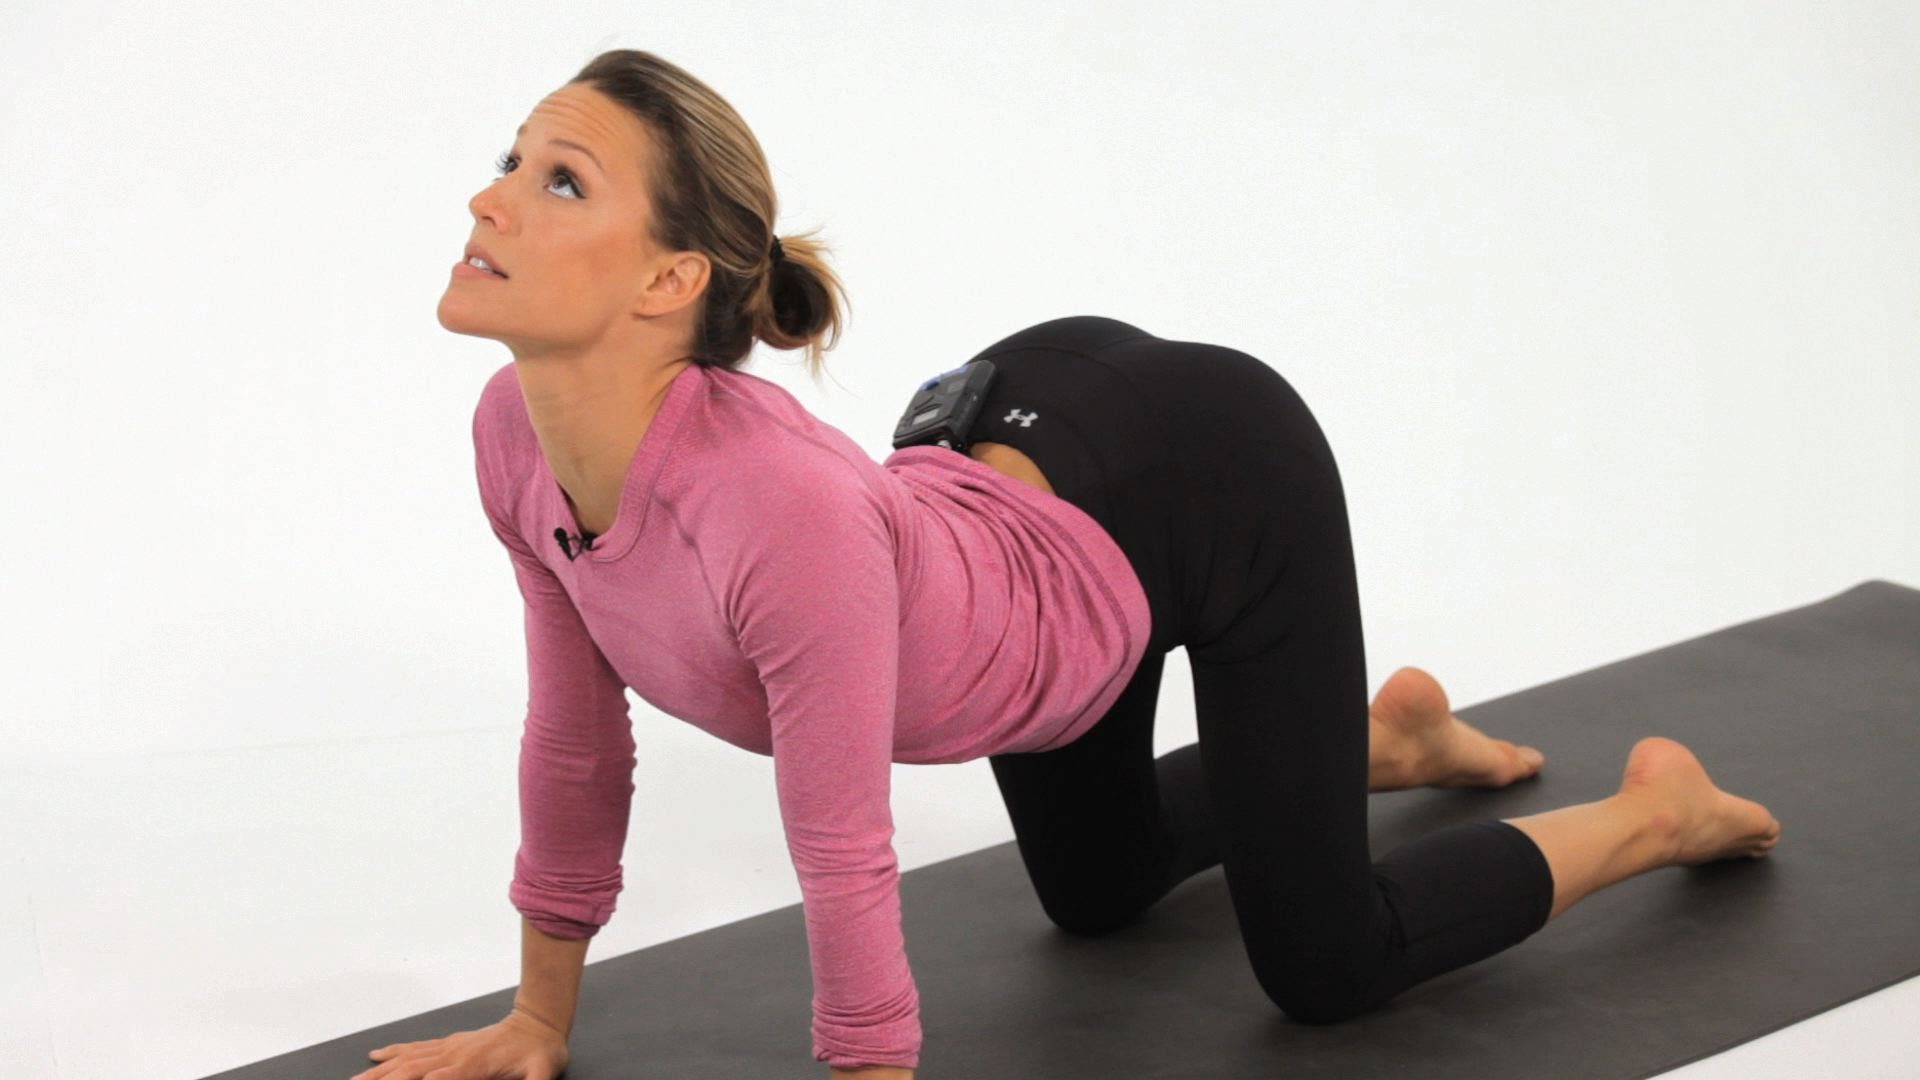
Cat-Cow Pose
If you are in yoga teacher training and a client comments that they are having back pain then you need to push them toward the Cat-Cow pose. While far from an attractive looking pose, the Cat-Cow pose is great for helping your client ease into a routine that helps to loosen up their back and relieve some of the pain that they may be dealing with. The fact that this pose is super simple is just extra. So to perform the Cat-Cow you will begin on all fours with your hands below your shoulders. Now, spread your fingers wide and inhale. As you inhale you will want to arch your back like a cat that is about to hiss. As you arch you will want to lower your chin to your chest and the tilt it back, like a cow beginning to moo. Do this a few times to make your spine feel less tight and relieve some of the pain your client might be dealing with.
Cat-Cow Pose
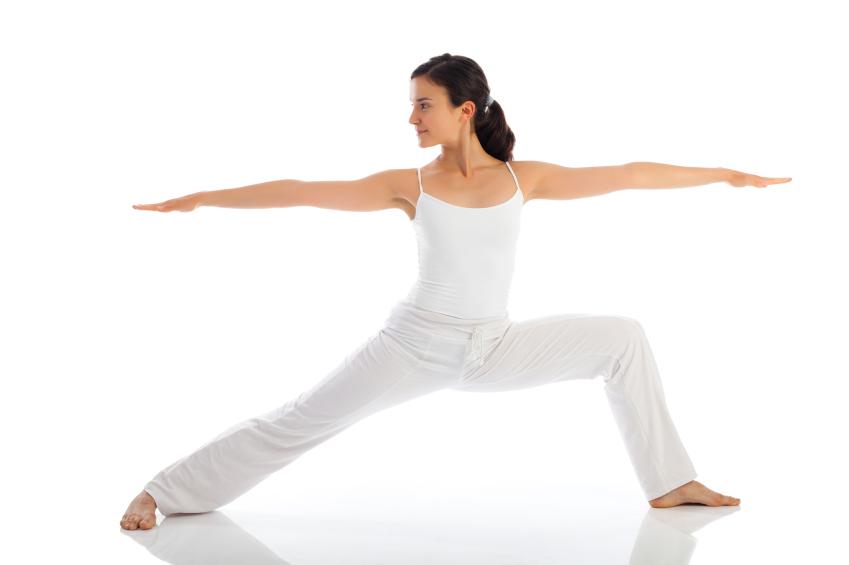
The Warrior
Now it is time to get the blood pumping a little bit and find your inner Warrior, or Virabhadrasana. The Warrior Pose is most commonly seen in movie montages where people are training on the beach. Their legs are spread apart with one leg pushing forward at a distance of three or four feet. You want your right foot hooked in at about a 90 degree angle while your left foot is just ever so slightly leaning in. Now, with your shoulders still down you want to extend your arms in either direction, away from your body, as you lunge into your right knee. Keep your knee in line with your foot and don’t let either one get ahead of the other. While performing this maneuver you want your focus pointed at the hand forward. Switch sides and repeat as long as necessary.
The Warrior
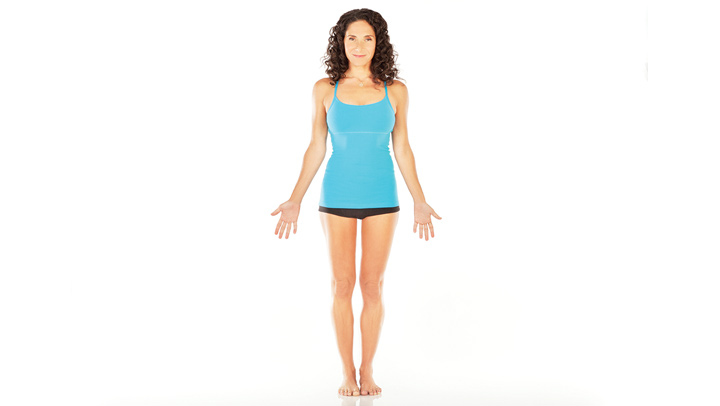
Mountain Pose
In order to feel strong on the inside, you must hone your inner mountain. Perform the Tadasana simply and easily by following the directions below. Though seemingly simple, the Mountain pose is an integral part to a well balanced yoga routine. You will want to stand flat on your feet with your back straight and your shoulders up. Keep your feet close enough together that your toes are touching one another. Now close your eyes and let your arms stay at your side, fingers close enough together so as to be touching. Now slowly arch your back upward, shoulders pulling back, until you are stretched as far as true comfort will allow you to be. Breathe deeply, slowly, and then let it out at that same tempo. Repeat as often as you like and find yourself a balance with both your mind and your body. Though you may feel like you aren’t doing much, you are giving strength to your back while also balancing your stress and worries. Put the Mountain pose before the Warrior pose for an effective one, two punch.
Mountain Pose
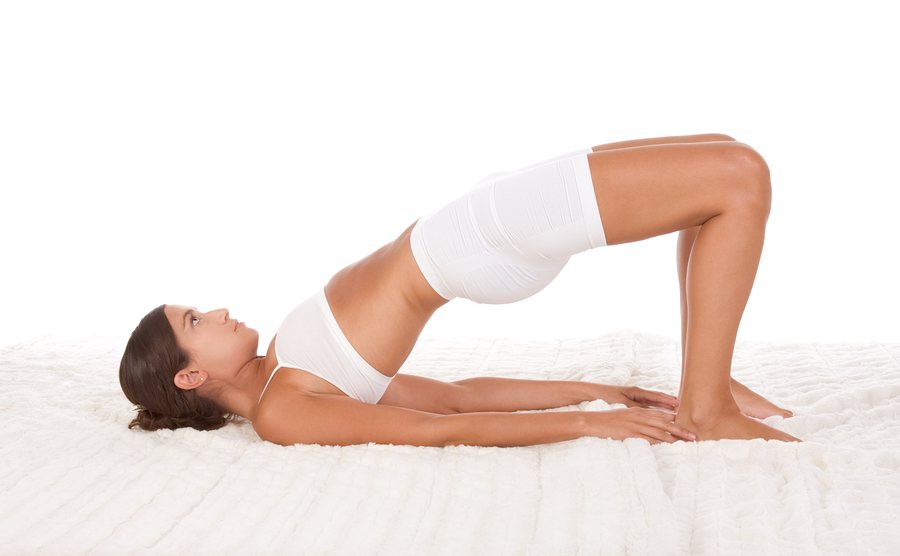
The Bridge
You may read ‘Bridge’ and think that you know which pose this is, but you are probably wrong. The Setu Bhanda, or Bridge pose, is much different than simply arching your back while on all fours. Instead you will want to lay flat on your yoga mat, preferably after doing some warm up stretches. Keep your arms at your sides and your shoulders pressed down. Now, slowly bend your knees into a 90 degree angle so that the lower half of your body begins to rise. With the bridge formed you want to clasp both of your hands together, into a fist, underneath the bridge. This hand clasping maneuver will provide support as you lift your hips off of the ground. Now, tuck your chin into your chest and hold the position. If you are uncomfortable physically then put a pillow under your hips or your head in order to provide some elevation and added cushion. This pose will help strengthen your chest while working your neck and spine in a positive way, increasing your flexibility. This move is suggested to be performed before venturing any deeper into the more advanced back bending poses.
The Bridge
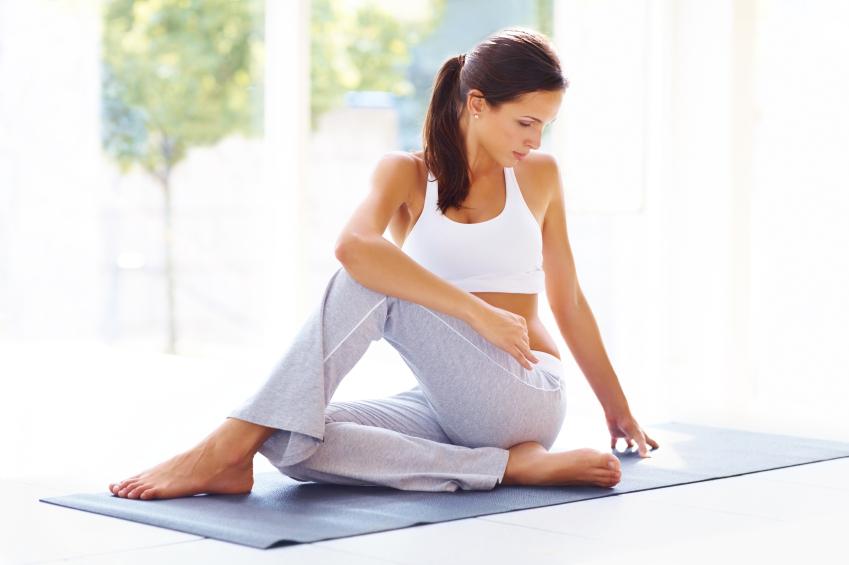
Seated Twist
If you had P.E. when you went to school then you’ve likely already become passively familiar with the Ardha Matsyendrasana, or Seated Twist. This exercise is exceedingly simple, yet enormously effective, giving you a great stretch from your waist to your neck while hitting your spine and shoulders in between. For this exercise you will merely need to sit down on the floor with your legs slightly extended. Take your right foot and put it just outside of your left thigh, effectively crossing the leg. Now curl your other leg under your right thigh, bringing it in tight without actually sitting on it. Now you should be staring straight ahead with your legs crossed, though slightly up. Now put your left arm in front of your knee and use it as torque in order to twist your body, rotating from the core of your abs. Keep your butt firmly planted on the floor and make sure not to turn more than you are comfortable. You’ll be feeling a great stretch at this point, so you want to hold it for a period of time. Now switch and repeat the process with your other side, digging in deep. Repeat this before any strenuous activity and you will likely see a giant reduction in nagging, muscle related injuries to your back. If you work in heavy labor, such as stocking shelves, this is also a great warm up pose for your shift.
Seated Twist
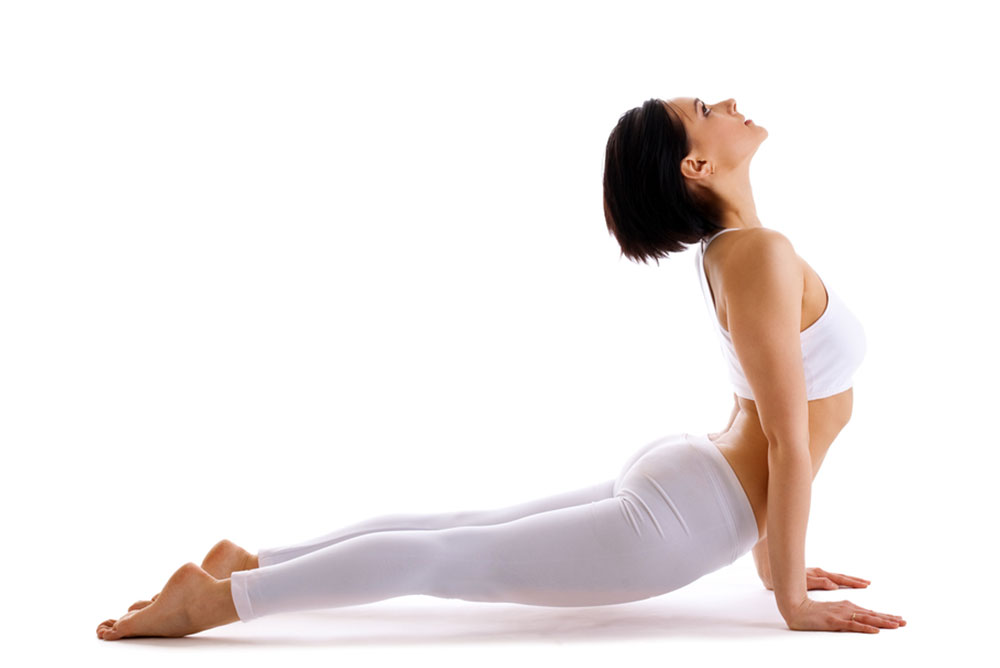
Upward Facing Dog
Your back is structurally so important to your body that it is no wonder we spend so much time focusing on it with our yoga poses The Upward Facing Dog, otherwise known as the Urdhva Mukha Svanasana, is a stalwart member of the beginners posing tree and for good reason. You can get a great stretch for your spine, waist, and arms and you can do it with little space available. Simply lay down on the floor with your face down. Keep your thumbs placed under your shoulders, like a push up, and your legs stretched out backwards with the sole of your foot facing upward. Keeping your hips tucked in and your upper thighs on the floor you will slowly raise your upper body, thus performing the stretch.
Upward Facing Dog